Written on: Updated on:
Absolute Paths
This tests how using different Liquid tags will output URLs. While all of them output the same results, Option 2 in each case is the cleanest and shortest method.
Site Absolute URL
- Option 1: https://justinhartman.co
{{ site.url }}{{ site.basurl }} - Option 2: https://justinhartman.co
{{ site.url | absolute_url }}
Page URL
- Option 1: https://justinhartman.co/personal/kitchen-sink.html
{{ site.url | absolute_url }}{{ page.url }} - Option 2: https://justinhartman.co/personal/kitchen-sink.html
{{ page.url | absolute_url }} - Option 3: https://justinhartman.co/personal/kitchen-sink.html
{{ site.url }}{{ site.basurl }}{{ page.url }}
Page Header Teaser
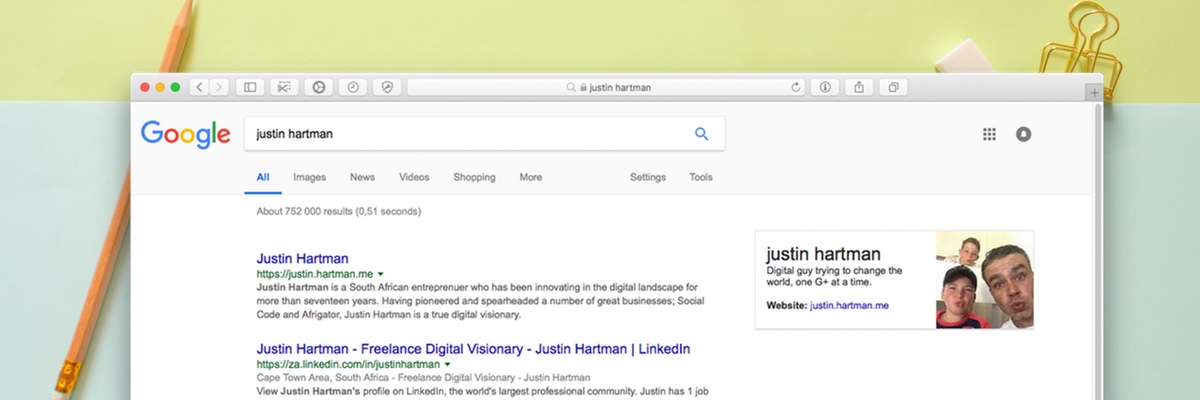
- Option 1: https://justinhartman.co/assets/images/kitchen-sink/justin-hartman-google_580x300.jpg
{{ site.url | absolute_url }}{{ page.header.teaser }} - Option 2: https://justinhartman.co/assets/images/kitchen-sink/justin-hartman-google_580x300.jpg
{{ page.header.teaser | absolute_url }} - Option 3: https://justinhartman.co/assets/images/kitchen-sink/justin-hartman-google_580x300.jpg
{{ site.url }}{{ site.basurl }}{{ page.header.teaser }}
Site Author Avatar
- Option 1: https://justinhartman.co/assets/images/general/justin-hartman.jpeg
{{ site.url | absolute_url }}{{ site.author.avatar }} - Option 2: https://justinhartman.co/assets/images/general/justin-hartman.jpeg
{{ site.author.avatar | absolute_url }} - Option 3: https://justinhartman.co/assets/images/general/justin-hartman.jpeg
{{ site.url }}{{ site.basurl }}{{ site.author.avatar }}
Image Paths
- Option 1: https://justinhartman.co/assets/images/favicon/Icon-60.png
{{ site.url | absolute_url }}/assets/images/favicon/Icon-60.png - Option 2: https://justinhartman.co/assets/images/favicon/Icon-60.png
{{ '/assets/images/favicon/Icon-60.png' | absolute_url }} - Option 3: https://justinhartman.co/assets/images/favicon/Icon-60.png
{{ site.url }}{{ site.basurl }}/assets/images/favicon/Icon-60.png
File Paths
- Option 1: https://justinhartman.co/assets/images/favicon/browserconfig.xml
{{ site.url | absolute_url }}/assets/images/favicon/browserconfig.xml - Option 2: https://justinhartman.co/assets/images/favicon/browserconfig.xml
{{ '/assets/images/favicon/browserconfig.xml' | absolute_url }} - Option 3: https://justinhartman.co/assets/images/favicon/browserconfig.xml
{{ site.url }}{{ site.basurl }}/assets/images/favicon/browserconfig.xml
Atom Feed
- Option 1: https://justinhartman.cohttps://justinhartman.co/feed.xml
{{ site.url | absolute_url }}{{ site.atom_feed.path }} - Option 2: https://justinhartman.co/feed.xml
{{ site.atom_feed.path | absolute_url }} - Option 3: https://justinhartman.cohttps://justinhartman.co/feed.xml
{{ site.url }}{{ site.basurl }}{{ site.atom_feed.path }}
Responsive Video Embed
Embed a video from YouTube or Vimeo that responsively sizes to fit the width of its parent.
| Parameter | Required | Description |
|---|---|---|
id |
Required | ID of the video |
provider |
Required | Hosting provider of the video, either youtube or vimeo
|
YouTube
To embed the following YouTube video at url https://www.youtube.com/watch?v=XsxDH4HcOWA (long version) or https://youtu.be/XsxDH4HcOWA (short version) into a post or page’s main content you’d use:
{% include video id="XsxDH4HcOWA" provider="youtube" %}
To embed it as a video header you’d use the following YAML Front Matter
header:
  video:
    id: XsxDH4HcOWA
    provider: youtube
Vimeo
To embed the following Vimeo video at url https://vimeo.com/212731897 into a post or page’s main content you’d use:
{% include video id="212731897" provider="vimeo" %}
To embed it as a video header you’d use the following YAML Front Matter
header:
  video:
    id: 212731897
    provider: vimeo
Footnotes
This shows how to create a footnote1. I think it’s flippen cool.
Text Alignment
Align text blocks with the following classes.
Left aligned text .text-left
Left aligned text
{: .text-left}
Center aligned text. .text-center
Center aligned text.
{: .text-center}
Right aligned text. .text-right
Right aligned text.
{: .text-right}
Justified text. .text-justify Lorem ipsum dolor sit amet, consectetur adipiscing elit. Pellentesque vel eleifend odio, eu elementum purus. In hac habitasse platea dictumst. Fusce sed sapien eleifend, sollicitudin neque non, faucibus est. Proin tempus nisi eu arcu facilisis, eget venenatis eros consequat.
Justified text.
{: .text-justify}
No wrap text. .text-nowrap
No wrap text.
{: .text-nowrap}
Figure
Generate a <figure> element with a single image and caption.
| Include Parameter | Required | Description |
|---|---|---|
| image_path | Required | Full path to image eg: /assets/images/filename.jpg. |
| Use absolute URLS for those hosted externally. | ||
| alt | Optional | Alternate text for image. |
| caption | Optional | Figure caption text. Markdown is allowed. |
Using the figure include like so:
{% include figure image_path="/assets/images/kitchen-sink/gallery-8.jpeg" alt="this is a Default image" caption="This is a figure caption." %}
Will output the following:

<figure>
  <img src="/assets/images/kitchen-sink/gallery-8.jpeg" alt="this is a Default image">
  <figcaption>This is a figure caption.</figcaption>
</figure>
Gallery
Generate a <figure> element with optional caption of arrays with two or more images.
To place a gallery add the necessary YAML Front Matter.
| Name | Required | Description |
|---|---|---|
| url | Optional | URL to link gallery image to (eg. a larger detail image). |
| image_path | Required | Full path to image eg: /assets/images/filename.jpg. Use absolute URLS for those hosted externally. |
| alt | Optional | Alternate text for image. |
| title | Optional | Title text for image. Will display as a caption in a Magnific Popup overlay when linked to a larger image with url. |
gallery:
  - url: /assets/images/kitchen-sink/gallery-5.jpeg
    image_path: /assets/images/kitchen-sink/gallery-5-th.jpeg
    alt: "Default image 1"
    title: "Image 1 title caption"
  - url: /assets/images/kitchen-sink/gallery-6.jpeg
    image_path: /assets/images/kitchen-sink/gallery-6-th.jpeg
    alt: "Default image 2"
    title: "Image 2 title caption"
  - url: /assets/images/kitchen-sink/gallery-7.jpeg
    image_path: /assets/images/kitchen-sink/gallery-7-th.jpeg
    alt: "Default image 3"
    title: "Image 3 title caption"
And then drop-in the gallery include in the body where you’d like it to appear.
| Include Parameter | Required | Description | Default |
|---|---|---|---|
| id | Optional | To add multiple galleries to a document uniquely name them in the YAML Front Matter and reference in {% include gallery id="gallery_id" %}
|
gallery |
| class | Optional | Use to add a class attribute to the surrounding <figure> element for additional styling needs. |
|
| caption | Optional | Gallery caption description. Markdown is allowed. |
{% include gallery caption="This is a sample gallery with **Markdown support**." %}
Gallery example with caption:


Feature Row
Designed to compliment the splash page layout2 as a way of arranging and aligning “feature blocks” containing text or image.
To add a feature row containing three content blocks with text and image, add the following YAML Front Matter
| Name | Required | Description | Default |
|---|---|---|---|
| image_path | Required | Full path to image eg: /assets/images/filename.jpg. Use absolute URLS for those hosted externally. |
|
| alt | Optional | Alternate text for image. | |
| title | Optional | Content block title. | |
| excerpt | Optional | Content block excerpt text. Markdown is allowed. | |
| url | Optional | URL that the button should link to. | |
| btn_label | Optional | Button text label. |
more_label in UI Text data file. |
| btn_class | Optional | Button style. See buttons for options. | btn |
feature_row:
  - image_path: /assets/images/kitchen-sink/gallery-1-th.jpeg
    alt: "Default image 1"
    title: "Default 1"
    excerpt: "This is some sample content that goes here with **Markdown** formatting."
  - image_path: /assets/images/kitchen-sink/gallery-2-th.jpeg
    alt: "Default image 2"
    title: "Default 2"
    excerpt: "This is some sample content that goes here with **Markdown** formatting."
    url: "#test-link"
    btn_label: "Read More"
    btn_class: "btn--inverse"
  - image_path: /assets/images/kitchen-sink/gallery-10-th.jpeg
    title: "Default 3"
    excerpt: "This is some sample content that goes here with **Markdown** formatting."
And then drop-in the feature row include in the body where you’d like it to appear.
| Include Parameter | Required | Description | Default |
|---|---|---|---|
| id | Optional | To add multiple rows to a document uniquely name them in the YAML Front Matter and reference in {% include feature_row id="row2" %}
|
feature_row |
| type | Optional | Alignment of the featured blocks in the row. Options include: left, center, or right aligned. |
{% include feature_row %}
Default 1
This is some sample content that goes here with Markdown formatting.


Default 3
This is some sample content that goes here with Markdown formatting.
Image Alignment
Position images with the following classes.

The image above happens to be centered.
{: .align-center}
![]() The rest of this paragraph is filler for the sake of seeing the text wrap around the 150×150 image, which is left aligned. There should be plenty of room above, below, and to the right of the image. Just look at him there — Hey guy! Way to rock that left side. I don’t care what the right aligned image says, you look great. Don’t let anyone else tell you differently.
The rest of this paragraph is filler for the sake of seeing the text wrap around the 150×150 image, which is left aligned. There should be plenty of room above, below, and to the right of the image. Just look at him there — Hey guy! Way to rock that left side. I don’t care what the right aligned image says, you look great. Don’t let anyone else tell you differently.
{: .align-left}
![]()
And now we’re going to shift things to the right align. Again, there should be plenty of room above, below, and to the left of the image. Just look at him there — Hey guy! Way to rock that right side. I don’t care what the left aligned image says, you look great. Don’t let anyone else tell you differently.
{: .align-right}
The image above should extend outside of the parent container on right.

{: .full}
Buttons
| Button Type | Example | Class | Kramdown |
|---|---|---|---|
| Default | Text | .btn |
[Text](#link){: .btn} |
| Primary | Text | .btn .btn--primary |
[Text](#link){: .btn .btn--primary} |
| Success | Text | .btn .btn--success |
[Text](#link){: .btn .btn--success} |
| Warning | Text | .btn .btn--warning |
[Text](#link){: .btn .btn--warning} |
| Danger | Text | .btn .btn--danger |
[Text](#link){: .btn .btn--danger} |
| Info | Text | .btn .btn--info |
[Text](#link){: .btn .btn--info} |
| Inverse | Text | .btn .btn--inverse |
[Text](#link){: .btn .btn--inverse} |
| Light Outline | Text | .btn .btn--light-outline |
[Text](#link){: .btn .btn--light-outline} |
| Button Size | Example | Class | Kramdown |
|---|---|---|---|
| X-Large | X-Large Button | .btn .btn--primary .btn--x-large |
[Text](#link){: .btn .btn--primary .btn--x-large} |
| Large | Large Button | .btn .btn--primary .btn--large |
[Text](#link){: .btn .btn--primary .btn--large} |
| Default | Default Button | .btn .btn--primary |
[Text](#link){: .btn .btn--primary } |
| Small | Small Button | .btn .btn--primary .btn--small |
[Text](#link){: .btn .btn--primary .btn--small} |
Make any link standout more when applying the .btn class.
<a href="#" class="btn--success">Success Button</a>
Default Button Primary Button Success Button Warning Button Danger Button Info Button Inverse Button Light Outline Button
[Default Button Text](#link){: .btn}
[Primary Button Text](#link){: .btn .btn--primary}
[Success Button Text](#link){: .btn .btn--success}
[Warning Button Text](#link){: .btn .btn--warning}
[Danger Button Text](#link){: .btn .btn--danger}
[Info Button Text](#link){: .btn .btn--info}
[Inverse Button](#link){: .btn .btn--inverse}
[Light Outline Button](#link){: .btn .btn--light-outline}
X-Large Button Large Button Default Button Small Button
[X-Large Button](#link){: .btn .btn--primary .btn--x-large}
[Large Button](#link){: .btn .btn--primary .btn--large}
[Default Button](#link){: .btn .btn--primary }
[Small Button](#link){: .btn .btn--primary .btn--small}
Notices
Call attention to a block of text.
| Notice Type | Class |
|---|---|
| Default | .notice |
| Primary | .notice--primary |
| Info | .notice--info |
| Warning | .notice--warning |
| Success | .notice--success |
| Danger | .notice--danger |
Watch out! This paragraph of text has been emphasized with the {: .notice} class.
Watch out! This paragraph of text has been emphasized with the {: .notice--primary} class.
Watch out! This paragraph of text has been emphasized with the {: .notice--info} class.
Watch out! This paragraph of text has been emphasized with the {: .notice--warning} class.
Watch out! This paragraph of text has been emphasized with the {: .notice--success} class.
Watch out! This paragraph of text has been emphasized with the {: .notice--danger} class.
Notice Headline:
You can also add the .notice class to a <div> element.
- Bullet point 1
- Bullet point 2
JavaScript
You can add scripts to the <head> or closing </body> elements by adding paths to following arrays in _config.yml.
head_scripts:
  - https://code.jquery.com/jquery-3.3.1.min.js
  - /assets/js/your-custom-head-script.js
footer_scripts:
  - /assets/js/your-custom-footer-script.js
Blockquotes
Single line blockquote:
Stay hungry. Stay foolish.
Multi line blockquote with a cite reference:
People think focus means saying yes to the thing you’ve got to focus on. But that’s not what it means at all. It means saying no to the hundred other good ideas that there are. You have to pick carefully. I’m actually as proud of the things we haven’t done as the things I have done. Innovation is saying no to 1,000 things.
Steve Jobs — Apple Worldwide Developers’ Conference, 1997
Tables
| Employee | Salary | |
|---|---|---|
| John Doe | $1 | Because that’s all Steve Jobs needed for a salary. |
| Jane Doe | $100K | For all the blogging she does. |
| Fred Bloggs | $100M | Pictures are worth a thousand words, right? So Jane × 1,000. |
| Jane Bloggs | $100B | With hair like that?! Enough said. |
| Header1 | Header2 | Header3 |
|---|---|---|
| cell1 | cell2 | cell3 |
| cell4 | cell5 | cell6 |
| cell1 | cell2 | cell3 |
| cell4 | cell5 | cell6 |
| Foot1 | Foot2 | Foot3 |
Definition Lists
- Definition List Title
- Definition list division.
- Startup
- A startup company or startup is a company or temporary organization designed to search for a repeatable and scalable business model.
- #dowork
- Coined by Rob Dyrdek and his personal body guard Christopher “Big Black” Boykins, “Do Work” works as a self motivator, to motivating your friends.
- Do It Live
- I’ll let Bill O’Reilly explain this one.
Unordered Lists (Nested)
- List item one
- List item one
- List item one
- List item two
- List item three
- List item four
- List item two
- List item three
- List item four
- List item one
- List item two
- List item three
- List item four
Ordered List (Nested)
- List item one
- List item one
- List item one
- List item two
- List item three
- List item four
- List item two
- List item three
- List item four
- List item one
- List item two
- List item three
- List item four
Forms
HTML Tags
Address Tag
1 Infinite LoopCupertino, CA 95014
United States
Anchor Tag (aka. Link)
This is an example of a link.
Abbreviation Tag
The abbreviation CSS stands for “Cascading Style Sheets”.
Cite Tag
“Code is poetry.” —Automattic
Code Tag
You will learn later on in these tests that word-wrap: break-word; will be your best friend.
Strike Tag
This tag will let you strikeout text.
Emphasize Tag
The emphasize tag should italicize text.
Insert Tag
This tag should denote inserted text.
Keyboard Tag
This scarcely known tag emulates keyboard text, which is usually styled like the <code> tag.
Preformatted Tag
This tag styles large blocks of code.
.post-title {
  margin: 0 0 5px;
  font-weight: bold;
  font-size: 38px;
  line-height: 1.2;
  and here's a line of some really, really, really, really long text, just to see how the PRE tag handles it and to find out how it overflows;
}
Quote Tag
Developers, developers, developers…
–Steve Ballmer
Strong Tag
This tag shows bold text.
Subscript Tag
Getting our science styling on with H2O, which should push the “2” down.
Superscript Tag
Still sticking with science and Albert Einstein’s E = MC2, which should lift the 2 up.
Variable Tag
This allows you to denote variables.
Adding Content with Octopress
While completely optional, I’ve included Octopress and some starter templates to automate the creation of new posts and pages. To take advantage of it start by installing the Octopress gem if it isn’t already.
$ gem install octopress
New Post
Default command which creates a post in the _posts/ folder but tagged with the /life/ collection as this is now my default collection.
$ octop new post "Post Title"
To create posts per collection you need to create them as such:
$ octop new post "Linux Collection Post" -T linux
The above command will create a new post in the _posts directory however it will be created with the /linux/ collection so it can simply be moved to the _linux/ folder.
Similarly, these commands will create posts for each of the other collections found on the site.
$ octop new post "Projects Collection Post" -T projects
$ octop new post "Technical Collection Post" -T technical
Default works great if you want all your posts in one directory, but if you want to group them into subfolders like /posts, /portfolio, etc. Then this is the command for you. By specifying the DIR it will create a new post in that folder and populate the categories: YAML with the same value.
$ octop new post "New Portfolio Post Title" --dir portfolio
New Page
To create a new page use the following command.
$ octop new page new-page/
This will create a page at /new-page/index.md